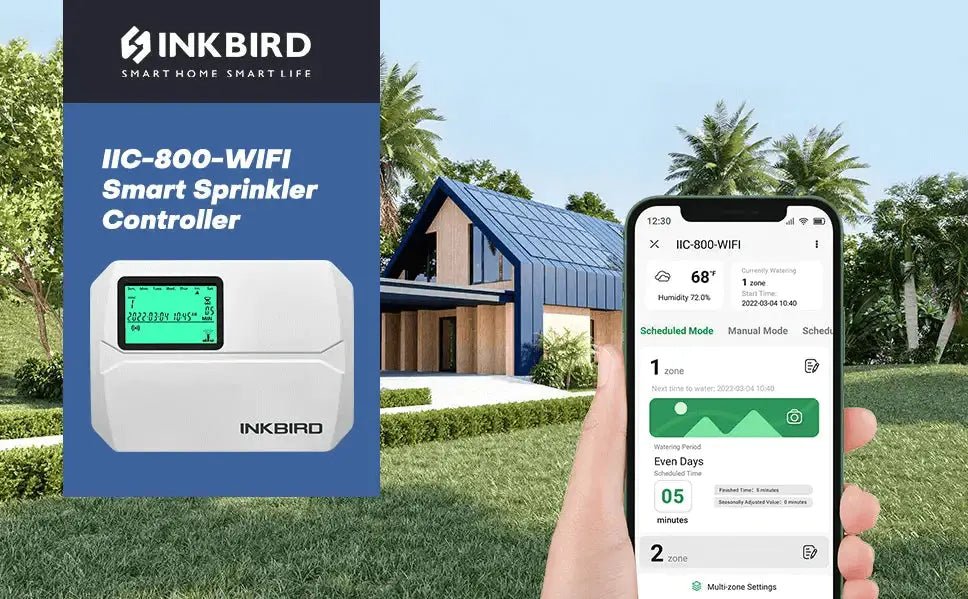
For anyone who wants a soft, green lawn, the lawn must be well cared for, weeded, aerated, and most importantly, watered adequately and regularly every season. When it comes to watering the lawn, the INKBIRD IIC-800-WIFI smart sprinkler controller is a great helper, helping us water in time, even on the go.

The INKBIRD IIC-800-WIFI is a better choice for residential and commercial lawn care due to its WiFi capability and user-friendly features. To get the best out of it, here are some tips for programming the INKBIRD IIC-800-WIFI through the INKBIRD App:
1. How to Connect It with Our Smartphone
There are 2 methods when we try to connect the sprinkler controller with our smartphone through Wi-Fi networks—SmartConfig Mode (when the WiFi icon flashes quickly) and AP Mode (when the WiFi icon flashes slowly). By the way, make sure that our smartphone has previously installed the latest INKBIRD app, which supports smartphones with iOS 11.0+ and Android 5.0+. If not, please download it here: Download INKBIRD App
-
SmartConfig Mode Connection
To establish the connection in the SmartConfig mode (when the Wi-Fi icon flashes quickly), we can follow these steps:
Step 1: Open the INKBIRD app, and Click the "+" in the upper right corner to find the INKBIRD IIC-800-WIFI. Then, click the device icon on the app to start connecting.


Step 2: Turn on the INKBIRD IIC-800-WIFI, confirm that the Wi-Fi icon is flashing fast, select “Fast Flash” on the app, and click “Next Step” to continue.


Step 3: Enter our home WiFi account and password, then click “Next step” to continue. Please noted that this device supports a 2.4GHz Wi-Fi network only.

-
AP Mode Connection
In fact, the AP mode connection is to connect the sprinkler controller with the smartphone through the hotspot of the sprinkler controller. To establish the connection in the AP mode (when the WiFi icon flashes slowly), we can follow these steps:
Step 1: Turn on the INKBIRD IIC-800-WIFI, confirm that the Wi-Fi icon is slowly flashing, select “Slow Flash” on the app, and click “Next” to continue.

Step 2: Enter our home Wi-Fi account and password, then click “Next step” to continue. Please noted that this device supports a 2.4GHz Wi-Fi network only.

Step 3: Go to the phone's WLAN setting page, select “SmartLife-XXXX” to connect to the router, and return to the connection interface for confirmation. (Note that each model has its own hotspot serial number, starting with the same “SmartLife-” but with a different number “XXXX” after it.)


Step 4: Connection succeeded.


-
What If the WiFi Icon Stays Lit or Disappears on the Screen?
Sometimes the WiFi icon on the screen doesn't flash at all and stays lit or disappears instead. In this case, we can operate to change the WiFi status and reset the connection.
Option 1 (Change to Fast Flash): Press and hold the  button for 2 seconds to reset the WiFi connection, then the WiFi icon will quickly flash within 5 seconds. At this point, the controller is in SmartConfig mode, so we can continue to connect it with our smartphone.
Option 2 (Change to Slow Flash): Press and hold the button for 2 seconds to reset the WiFi connection, then the WiFi icon will quickly flash within 5 seconds. At this point, the controller is in SmartConfig mode. We can wait for 5 seconds and then short press the button again, letting the WiFi icon flash slowly, that is AP mode.


After changing the WiFi status, we can continue to connect the INKBIRD IIC-800-WIFI with our smartphone in SmartConfig mode or AP mode.
2. Set the Time/Date First
We should correct the current time/date on the smart sprinkler controller before setting a watering schedule. If the current time/date on the sprinkler controller are incorrect, the watering schedules we set later will not work at the correct time.
When the INKBIRD IIC-800-WIFI smart sprinkler controller is connected to a Wi-Fi network, the current time/date will automatically update and sync with our local time. We can also modify the time/date on the controller by following the instructions in the user manual.

3. How to Update Local Weather Conditions?
By setting our location in the app home management, we can view the temperature, humidity, and local weather on the app monitoring interface. Therefore, we can easily confirm whether the weather is dry or wet and immediately increase or decrease the watering time of our lawn.
To set our location on the INKBIRD app, we can follow these steps:
Step 1: Go to home management of the app.
Step 2: Click “My Home” to enter the home settings, then click “Location” to set our location.

Step 3: Enter our location information, then click “OK”.

4. How to Create A Watering Schedule for Any Zone?
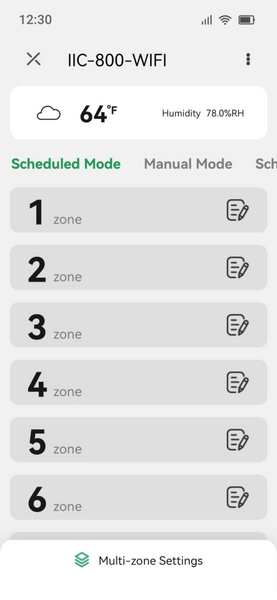
Setting watering schedules on the INKBIRD app is much easier and quicker than operating on the controller. There is a total of 8 zones of watering that can be set, modified, and canceled manually or automatically on the smart app. For example, we can set a watering schedule for Zone 1 on the app by following these steps:
Step 1: Click “Scheduled Mode” to enter the monitoring interface of scheduled irrigation mode, and click the EDIT icon to the right of Zone 1 to enter watering schedule settings. We can modify the name of Zone 1 as needed.
Step 2: Click to choose how often we want to water Zone 1. We have 4 options—
- odd days (water on every 1,3,5,7,9,… of each month)
- even days (water on every 2,4,6,8,10,…of each month)
- custom days (water on every selected day of the week)
- intervals (water on every X days).
Step 3: Set a specific start date if we choose “Intervals” on “Watering Period”.
Step 4: Select Obey/Ignore on rain sensor settings. If we choose “Obey”, the watering schedule will be skipped on rainy days and avoid overwatering. If we choose “Ignore”, the watering schedule will continue on rainy days.
Step 5: “Scheduled irrigation time” is the watering duration. If we set 8 minutes, the Zone 1 sprinkler will automatically run for 8 minutes and then stop watering.
Step 6: “Start Time” is the time we want the sprinkler to start watering. We can set a max of 6 start times in a day so that the sprinkler will run 6 times a day and run for 8 minutes each time.


Once we have completed the watering schedule for any zone, make sure to click “Done” in the upper right corner to save our settings.
5. How to Set A Watering Schedule for Multiple Zones At Once?
If we want multiple zones to run on the same watering schedule, we don’t need to set them up one by one. We only need a few steps to achieve the function.
Step 1: Click “Multi-zone Settings” on the main interface.
Step 2: Click on the zone number where we want to implement the same watering schedule.
Step 3: Set watering period, rain sensor setting, watering duration, and start times.Then, click “OK” to save our settings.Watering will then start sequentially on all selected zones.


6. How to Duplicate the Watering Schedule for Zone 1 to Other Zones?
What if we have previously set up a watering schedule for zone 1 and want to replicate that schedule in other zones? Don’t worry, we can achieve that by following these steps:
Step 1: Click “Multi-zone Settings” to enter the setting.
Step 2: Click on the zone number where we want them to implement the same watering schedule as Zone 1. Then, click the COPY  icon to continue. (We don’t need to modify any watering time settings at this step.)
Step 3: Click “OK” in the upper right corner to save the settings. We may need to wait for a few seconds to view the result on the main interface.


7. How to Operate on Manual Mode?
In manual mode, we can pause the watering schedule in the process and immediately add extra water to the designated zones by following these steps:
- Set on one zone: For example, to add extra water to Zone 1 for 5 minutes, we can slide the switch to ON and enter 5 for the remaining time. Once set, the sprinkler on Zone 1 will immediately water for 5 minutes. We can stop it at any time.


- Set on multiple/all zones:Similar to the setting logic of Schedule Mode, we can also set multiple zones at the same time. However, all set zones here will work in sequence instead of running at the same time. We can follow these steps to achieve this function:
Step 1: Click “Multi-zones” to enter the setting.
Step 2: Click on zone numbers where we want to add extra water and enter the watering time. Make sure to click “OK” to save the settings.
As shown below, if we set all zones to run for an additional 5 minutes, they will run one by one. We can click “Next” to stop the current zone and move to the next zone in the sequence at any time.


8. Tips About Seasonal Adjustment
Our lawn has different needs for water in different seasons/weather, but changing the entire schedule every season will be a hassle. However, with the seasonal adjustment function, we can increase/decrease the water amount by modifying the watering time with a simple one-key adjustment.
Step 1: Click “ ” in the upper right corner on the monitoring interface for more settings.
Step 2: We can swipe on the time bar or enter a number to adjust the watering time percentage. Note that this adjustment will apply to all watering schedules in all zones.
In this setting interface, pay attention to the "Reset Parameters" button, with which we can reset all parameters to zero, and all watering schedules will be deleted.


9. Dynamic Display And History
The display box at the top provides flexibility in displaying information. If no watering schedule is set, it will show the current temperature, humidity, and local weather. Amazingly, it will split into two boxes to simultaneously show us the ongoing watering information if we set a watering schedule.
By swiping on the main interface, we can move to the record block to view the three-month plan and the six-month history. Here we can view the entire watering schedule at one glance and be sure that we are taking good care of our lawn.


10. How to Add Our Home Members?
The smart INKBIRD APP allows for the addition of family members and sharing of the management. To add our home members, we can follow these steps:
Step 1: Go to the home page of the INKBIRD app, click “My Home” at the top, and enter the setting of Home Management.
Step 2: Click “My Home” to modify our home information, then click “Add Member”.
Step 3: Click “App Account” to enter the name of a family member and his/her INKBIRD app account. Then our family can control the same device from their smartphones.


- Smart Tap-To-Run Function
Another feature that makes the INKBIRD app amazing is the tap-to-run feature. This flexible functionality helps us deal with emergencies on time. We can design a tap-to-run program by following these steps:
Step 1: Click “Smart” to enter the tap-to-run setting, then click “+” in the upper right corner to continue.
Step 2: Click “+” on the “IF” block to set the trigger condition, then set a task triggered by the condition.
For example, we can set up to receive a notification when the rain sensor linked to the sprinkler controller is turned off, as shown in the image below.


With real-time monitoring of the watering process and instant optimization of water amounts, we can keep our lawn healthy and lush. With the INKBIRD app, we can make complicated things simple and build our own IoT home.
by Shirley


Share: